
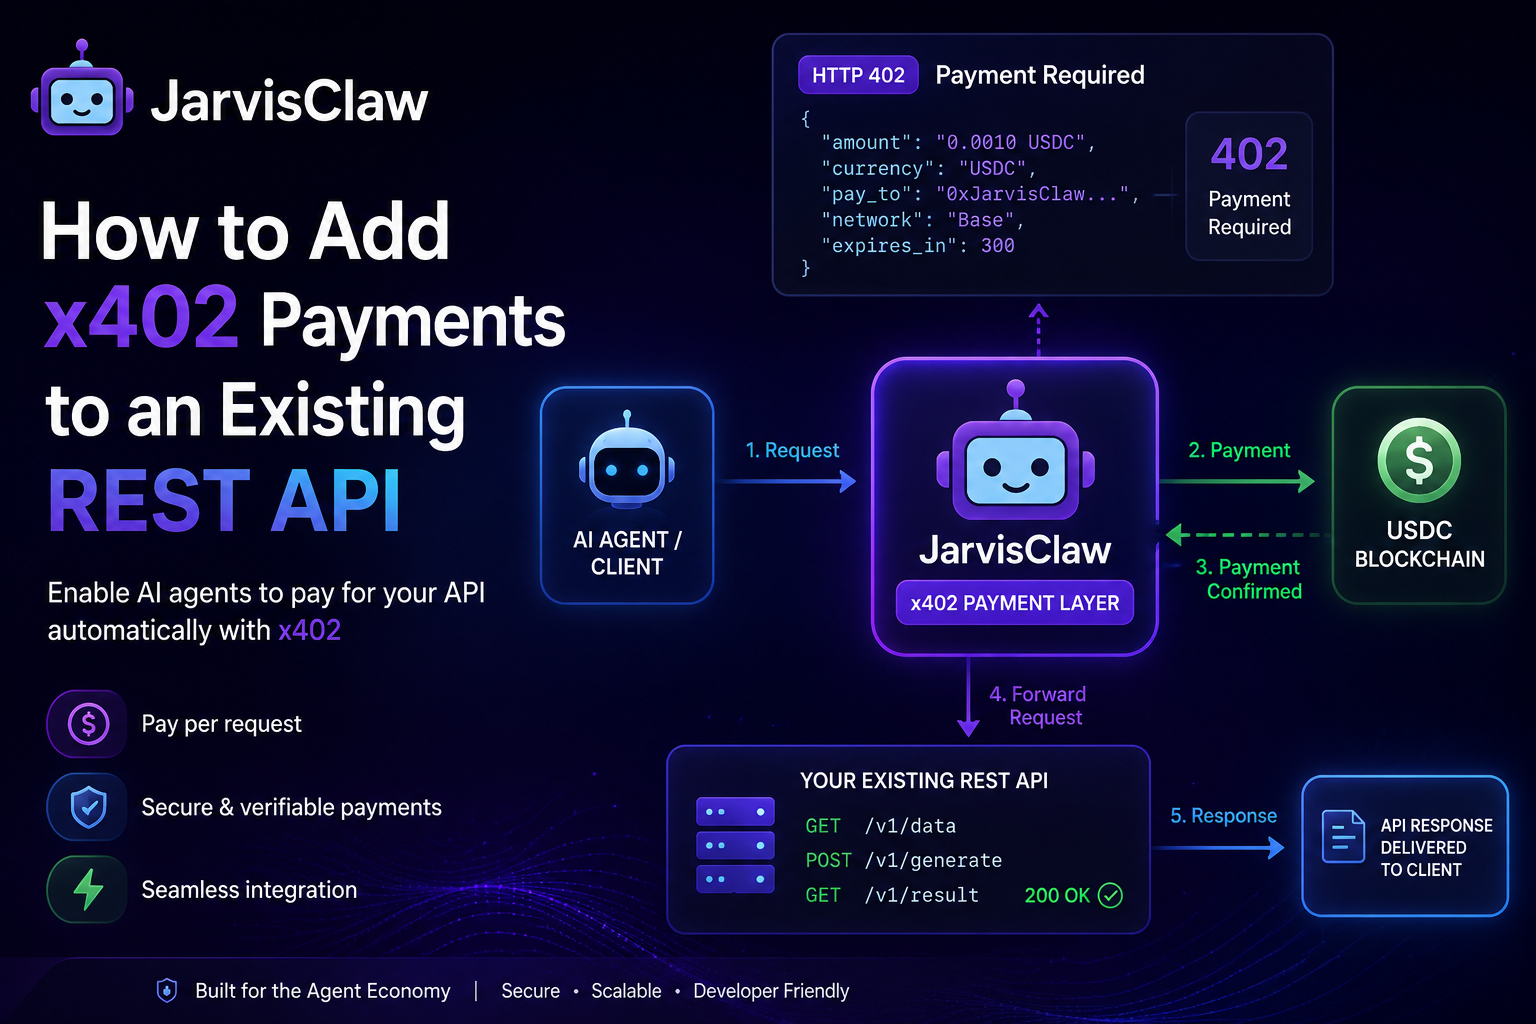
How to Add x402 Payments to an Existing REST API | JarvisClaw
Learn how to integrate x402 payments into your existing REST API without rebuilding your application. Discover the architecture, workflow, best practices, and how JarvisClaw simplifies implementation.
As AI agents become more autonomous, traditional API authentication methods are beginning to show their limitations. API keys, monthly subscriptions, and manual billing were designed for human developers—not software agents that need to discover, purchase, and consume services automatically.
This is where x402 changes everything.
Built around the long-unused HTTP 402 Payment Required status code, x402 enables APIs to request payment before serving a response. Instead of relying on subscriptions or pre-issued API keys, every request can become a secure, verifiable transaction.The good news?
You don’t have to rebuild your API from scratch to adopt this model.In this guide, you’ll learn how to add x402 payments to an existing REST API, understand the required architecture, and see how JarvisClaw helps developers implement x402 with minimal changes.
Why Add x402 to an Existing REST API?
Most REST APIs already expose valuable services through predictable endpoints. The challenge is monetisation.

Traditional approaches often involve:
- Monthly subscriptions
- Credit-based systems
- API key management
- External billing platforms
- Manual customer onboarding
These methods work well for human users but introduce friction for AI agents that need to pay for services autonomously.
Adding x402 allows your API to:
- Charge per request instead of per month
- Accept automated payments from AI agents
- Remove API key distribution
- Simplify developer onboardingCreate new revenue opportunities
Rather than replacing your existing API, x402 simply adds a payment layer before protected endpoints.
How x402 Fits into Your Existing API
Think of x402 as middleware that sits between the client and your REST API.

Instead of this workflow:
Client
│
API Gateway
│
REST API
Your architecture becomes:
Client
│
x402 Payment Layer
│
API Gateway
│
REST API
When a client requests a paid endpoint, the x402 layer checks whether payment has been made before forwarding the request.
This keeps your business logic unchanged while introducing programmable payments.
Step 1: Identify Paid Endpoints
Not every endpoint needs payment.
Start by identifying which resources provide premium value.
Examples include:
- AI inference endpoints
- Image generation
- APIsTranslation services
- Financial data
- Weather APIs
- Premium search
- Large language model inference
Public endpoints such as health checks or documentation can remain free.
Step 2: Return HTTP 402 for Unpaid Requests

When an unpaid request reaches a protected endpoint, return:
HTTP/1.1 402 Payment Required
Along with payment instructions.
The response typically includes:
- Payment amount
- Accepted token (such as USDC)
- Payment destination
- Payment metadata
- Verification details
Step 3: Accept Payment
After receiving the payment instructions, the client completes the transaction.
For autonomous AI agents, this happens automatically.
The payment may be processed using supported blockchain infrastructure and stablecoins like USDC.
Once payment is complete, proof of payment accompanies the original request.
Step 4: Verify the Payment
Before forwarding the request to your application, verify that:
- Payment exists
- Payment amount is correct
- Transaction is valid
- Payment hasn’t expired
- Transaction hasn’t already been used
Only after successful verification should the API process the request.
This keeps your API secure while preventing fraudulent or duplicate payments.
Step 5: Return the Requested Resource
Once payment verification succeeds, your API behaves exactly as before.
The client receives:
- JSON response
- ImageAI completion
- Search results
- File download
From the application’s perspective, nothing has changed except that payment occurred first.
Common Integration Challenges
Although x402 is straightforward conceptually, developers often encounter practical implementation issues.
Payment Verification
Verifying blockchain transactions introduces additional logic that many REST APIs don’t currently have.
Request Retries
Clients occasionally retry failed requests.
Without proper idempotency handling, duplicate payments may occur.
Implement transaction tracking to ensure each payment is processed only once.
Latency
Payment verification adds another step before your API responds.
Caching successful payment verification and optimising network calls helps maintain performance.
Error Handling
Developers should return meaningful errors for:
- Invalid payments
- Expired transactions
- Incorrect payment amounts
- Unsupported currencies
Clear responses improve both developer experience and automated client behaviour.
Best Practices for x402 Integration
When adding x402 to your REST API, follow these recommendations:
- Keep payment logic separate from business logic.
- Protect only premium endpoints.
- Use standard HTTP responses consistently.
- Validate every payment before processing requests.
- Log payment events for auditing.
- Support idempotent requests.
- Monitor payment success rates.
- Document payment requirements clearly.
A clean separation between payment infrastructure and application logic makes future maintenance much easier.
How JarvisClaw Simplifies x402 Integration
Implementing x402 from scratch requires payment validation, transaction management, routing, and infrastructure that many teams would rather avoid building themselves.
This is where JarvisClaw provides significant value.JarvisClaw acts as an intelligent API gateway that helps developers integrate x402 payment workflows without rewriting existing services.Instead of embedding payment verification inside every endpoint, JarvisClaw can sit in front of your API, handling payment validation, request routing, retries, and intelligent infrastructure management before forwarding verified requests to your application.
For organisations already exposing REST APIs, this dramatically reduces development time while allowing teams to focus on building valuable services rather than payment infrastructure.
Whether you’re monetising AI inference, data services, automation tools, or agent-to-agent APIs, JarvisClaw makes adopting x402 significantly easier.
The Future of REST APIs Is Pay-Per-Request
The rise of autonomous AI agents is changing how software consumes services.Instead of signing contracts, managing subscriptions, or storing API keys, agents increasingly need to discover services, pay instantly, and continue their workflows without human involvement.
x402 provides the missing payment standard that enables this future.
By adding x402 to an existing REST API, developers can unlock flexible pay-per-use business models while maintaining compatibility with modern API architectures.
The transition doesn’t require rebuilding your platform. With the right architecture—and tools like JarvisClaw—you can introduce programmable payments incrementally, giving both human developers and autonomous AI agents a simpler, more scalable way to access your services.As the AI economy grows, APIs that support seamless, automated payments will be well positioned to serve the next generation of intelligent applications.
Start building with JarvisClaw today!!